Byte Main Page
Purpose
The goal of Byte is to be an assistive dog. It should help a blind person in their everyday tasks. We want to inspire us from this project:
Thesis Tazer: https://www.youtube.com/watch?v=L8qSAampsHU&t=534s
Requirements
The robot shall have a height of between 40 and 55 cm. This is about the normal size for robot dogs.
Each leg shall have 3 Degrees of Freedom
The robot should be able to be tele-operated
The robot should be able to move autonomously
The robot should be able to recognize objects in its surrounding
The robot should be safe to use around humans
Brainstorming Electrical/Sensor Requirements
2x 6S batteries
Plan for modularity
LIDAR
Camera
Speaker + Mic
GIM8010-8 Motors + drivers
Power circuitry
Jetson Orin Nano
AI accelerator (GPU)
IMU
Red emergency button
Test Setup Instructions
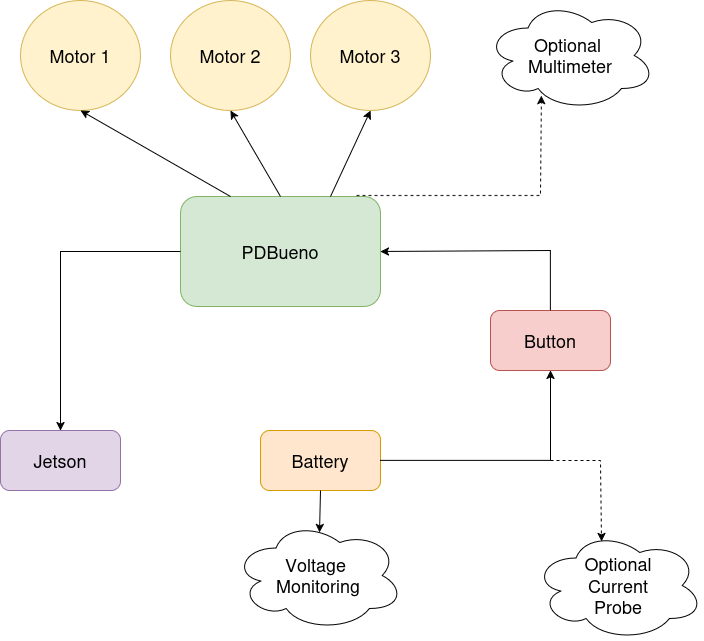
Here is a diagram of the wiring for the test setup:
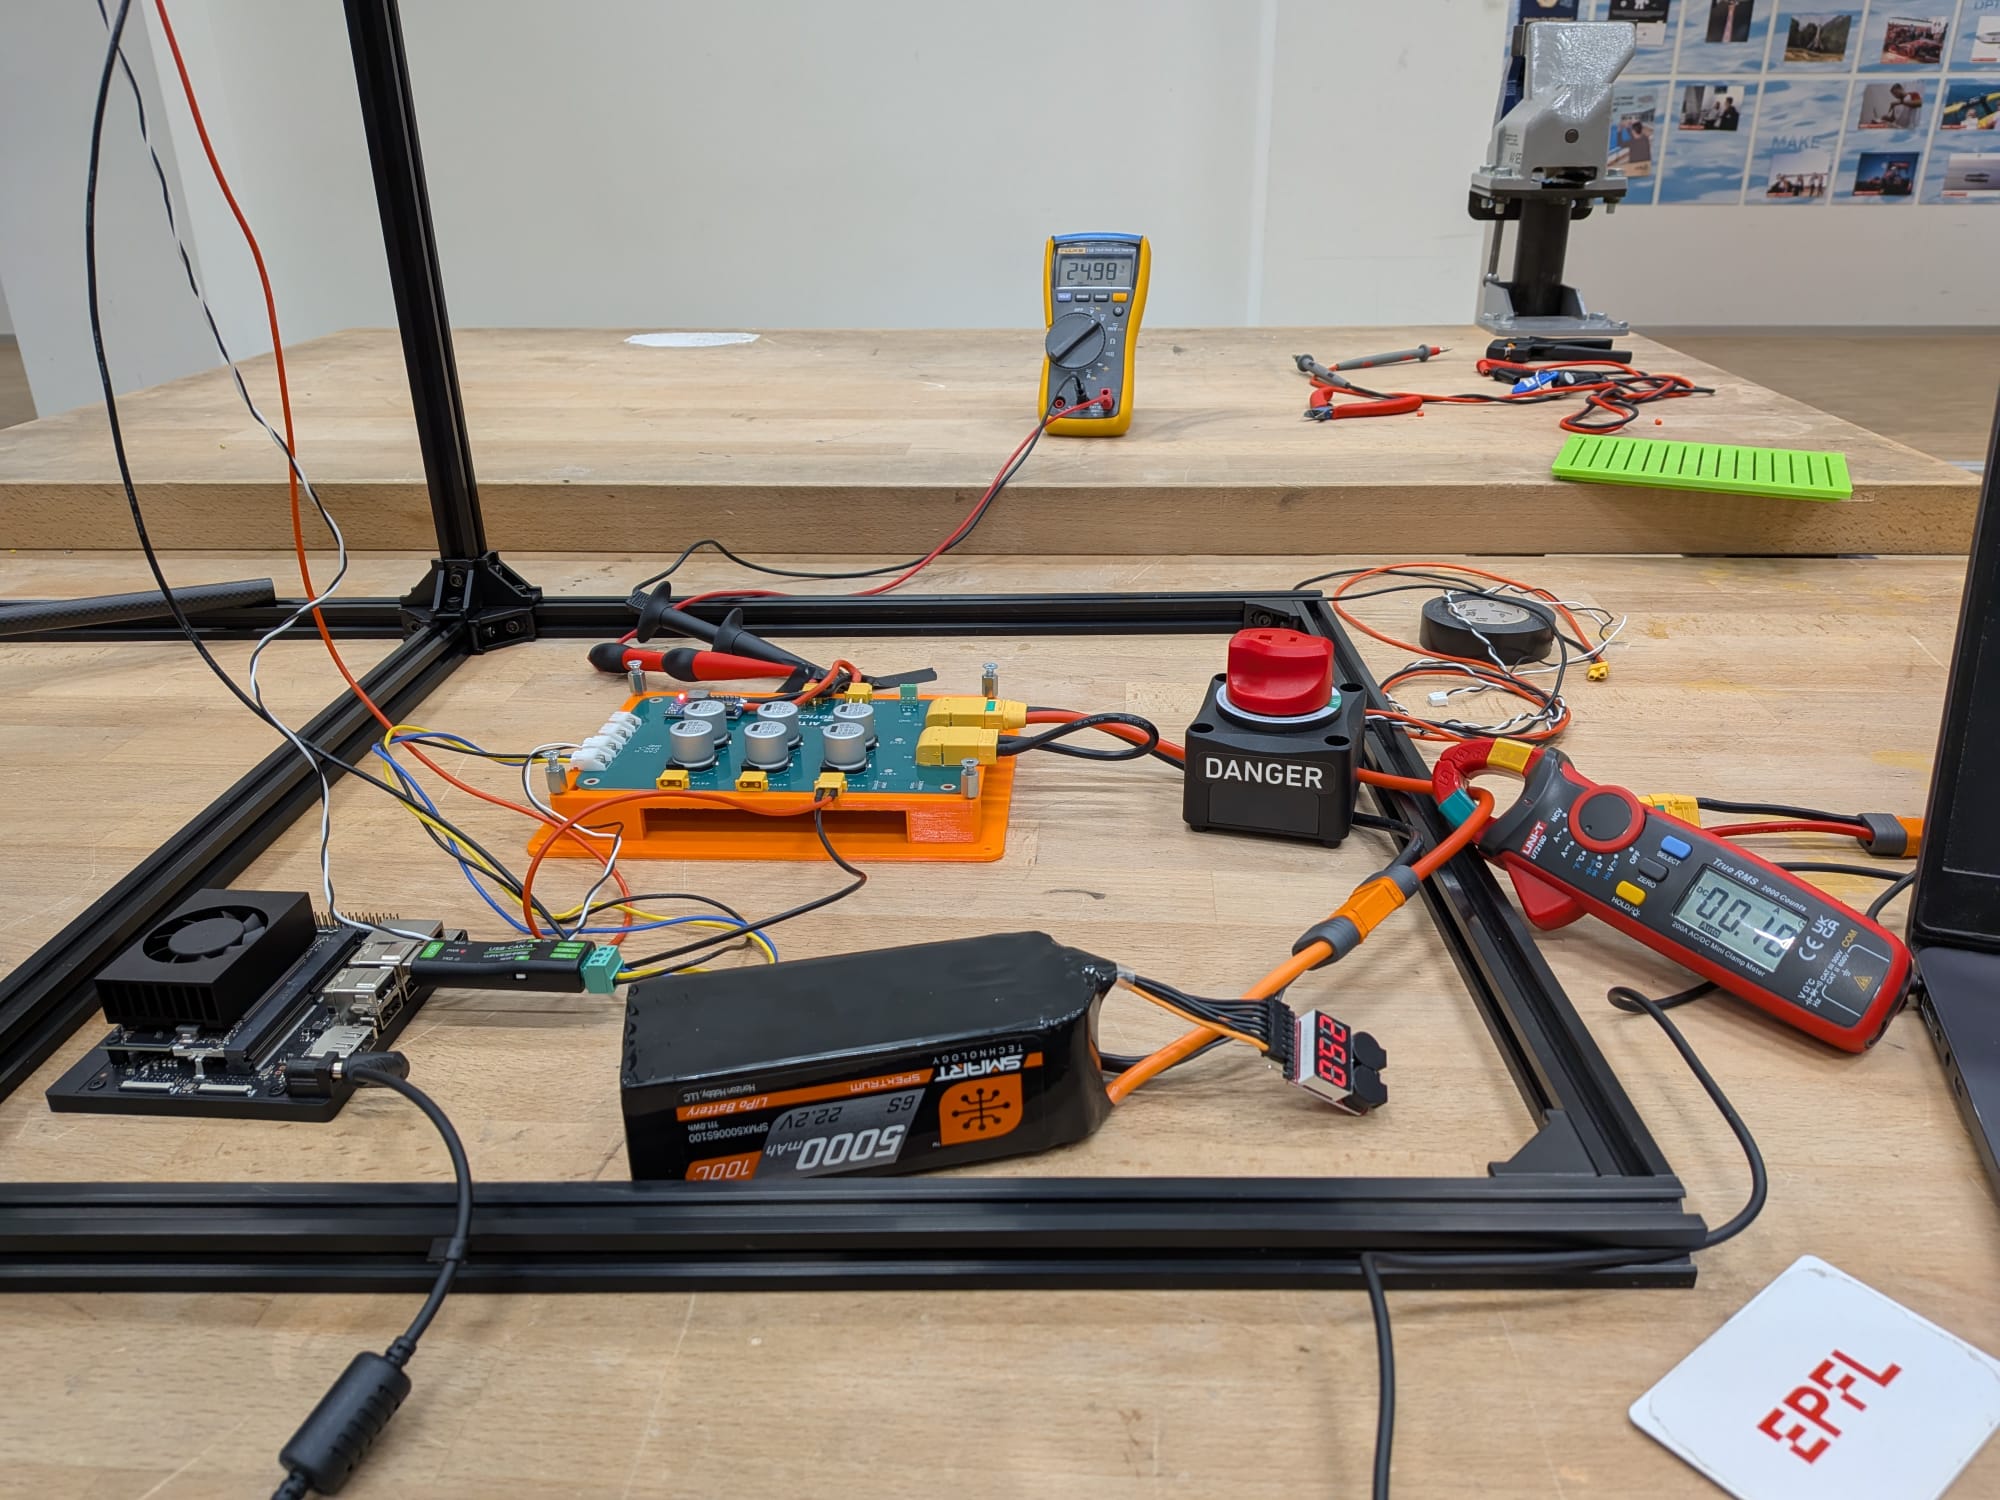
And the real implementation:
Step 1
Plug in the motors and the Jetson to the PDBueno
Step 2
Plug in the battery to the button
Step 3
Make sure the button is in the “ON” configuration
Step 4
Plug in the yellow anti-spark connector about 1/4 of the way in to the PDBueno to charge the capacitors (about 10 seconds). The light on the buck should turn on and you should see the voltage stabilize on the multimeter.
Step 5
Fully plug in the yellow anti-spark connector and the device is ready to use.
Nota Bene
If ever there is an issue, turn the red button to the OFF position. After having done so, wait for the capacitors to discharge (about 90 seconds) and disconnect the yellow anti-spark connector. If you wish to turn on the system again, repeat from Step 3.
Connecting to the Jetson
To connect to the Jetson, first make sure you are connected to the spot-iot Wi-Fi network, then run:
ssh byte@172.21.67.198
The password is woof1234*.